Table of Contents
- Table of Contents
- Introduction
- System Objectives
- Why use ExpROVer?
- Base System
- Complete System
- Intelligent functionalities
- Troubleshooting
Introduction
The ExpROVer is a software that allows its users to control Remotely Operated Vehicles (ROVs), specifically designed for the VideoRay Pro 4 (VRP4). It is open-sourced, free, supports various platforms, and even integrates several intelligent capabilities, such as object recognition, and semi-autonomous maneuvers.
It is comprised of 3 main elements:
- One or more end devices, with the ExpROVer mobile (android) or Web App,
- A server computer, connected to the ROV and running the ExpROVer backend application,
- And the VideoRay Pro 4 ROV.
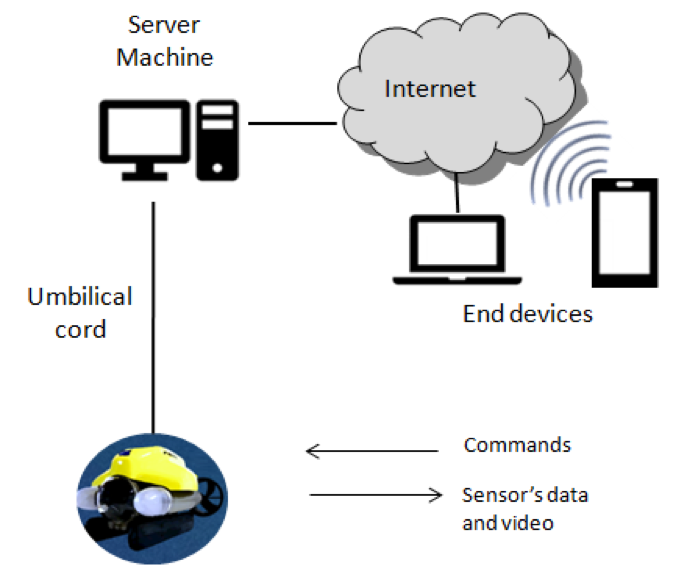
The server machine is a computer connected to the VRP4’s umbilical cord, and will first bridge the ROV’s software with the ROS, and secondly process the inputs received by the ROV, with CV technology, to detect objects.
End devices communicate with the server machine through a wired or wireless network, using either the developed web interface or a specialized mobile application. They receive the VRP4’s sensors data, and can also send high-level instructions with which to control the ROV.
As such, the ExpROVer software can offer connectivity to your VRP4 from any device, provided the setup was correct, as well as an elevated movement autonomy - requiring less training on ROV operation from the user - and high confidence video analysis, detecting objects and fishes; or even a great starting point to easily modify in order to suit user needs.
System Objectives
ExpROVer aims to be a software solution that simplifies a ROV’s operation while promoting the development of new software modules which enhance the availability of ROV appliances. The main objectives of ExpROVer solution are the following:
- Remote access to ROV through ROS
- ROV control, at anytime, from anywhere, through any device with connectivity through a Web or an mobile application
- Several semi-autonomous maneuvers enablement:
- Pre-programmed paths following:
- straight line movement
- turn a given amount of degrees
- combinations of 1 and 2 and
- movement in a straight line until a change is detected in the video feed.
- Automatic return to the surface, and
- direction maintaining.
- Built-in object detection and recognition systems
- Fully open-source code, providing the possibility of creation of new modules to suit more specific needs or features
Why use ExpROVer?
The use of ExpROVer software provides its user with several benefits, such as:
- higher operational efficiency when maneuvering ROV, due to Computer Vision and navigation helper functions, reducing both your workload and the focus required to operate your VRP4
- significant costs reduction, since less training is required, due to the myriad of available helper functionality and customizable peripheral integration
- the option of remotely controlling the ROV will also noticeably diminish the operational costs
- higher flexibility in control options, since ExpROVer allows the ROV to be controlled with a wide range of end devices over a web interface, as well as a dedicated Android interface
- deep customization possibilities, allowing its users and community to fully tweak the software to fit their needs and VRP4s configurations
- great user mobility in ROV data monitoring, from anywhere, at time, requiring only connectivity between the end device and the server machine (which is connected to the ROV via the umbilical cord)
Base System
Installation
The ExpROVer solution comprises two options: the base system and the complete system.
In the base system the user installs the software in the Linux PC connected to the ROV. This software will enable the reading the ROVs’ sensors values and the sending of the instructions into the ROV.
In this option the user should:
- Download the base system software from the ExpROVer open source repository
- If ROS is not installed on your computer, follow the instructions here to install it first
- Unpack the ExpROVer software and build all ROS catkin packages, through the command
$ ./build.sh - Follow the instruction given at the end of the previous script’s execution, adding the necessary lines to your
.bashrcfile.
Getting started with the base system
Make sure your ROV is underwater before you start operating it using the system.
Start
To start using the system you should execute a script:
- Verify both the ROV and a joystick command are connected to the computer.
- Open a terminal and run the command
$ rosrun videoray deploy.sh. - A window showing the ROV’s status/camera feed will have opened, and the joystick now controls the ROV’s movement:
- left joystick for vertical movement,
- right joystick for horizontal movement,
- X and Y buttons increase and decrease the light’s intesity, respectively,
- the L1 and R1 buttons control the camera’s upward and downward tilt, respectively.
Shutdown
To stop using the system, simply terminate the script (for example, by pressing Ctrl + C in the open terminal window).
Complete System
Installation
In the complete system option the user should:
- Download the base system software from the ExpROVer open source repository
- If ROS is not installed on your computer, follow the instructions here to install it first
- Unpack the ExpROVer software and build all ROS catkin packages, through the command
$ ./build.sh - Follow the instruction given at the end of the previous script’s execution, adding the necessary lines to your
.bashrcfile.
For the apps installation proceed as following:
- Download the ExpROVer mobile application to your Android smartphone, or open the web interface through a browser of your choosing.
- In case of the Android applciatin, after its successful installation, the graphical user interface will appear
- Ensure you are connected to the internet
- Configure the connection with the ROV, or choose a previously configured ROV connection (the web and Android accounts are synchronized, meaning you need only add a ROV once, in either of them).
Getting started with the complete system
If you want to use the server machine directly to control the ROV please carefully read the previous section instead. If you want to use the available applications, please choose between the web application or the mobile application, depending on whether your device is an Android device or not.
ExpROVer Web Application
Start
To start the application simply type the IP address of the computer serving as server (to obtain this address you can use online tools, your computer settings window, or simple type $ ifconfig in a terminal window).
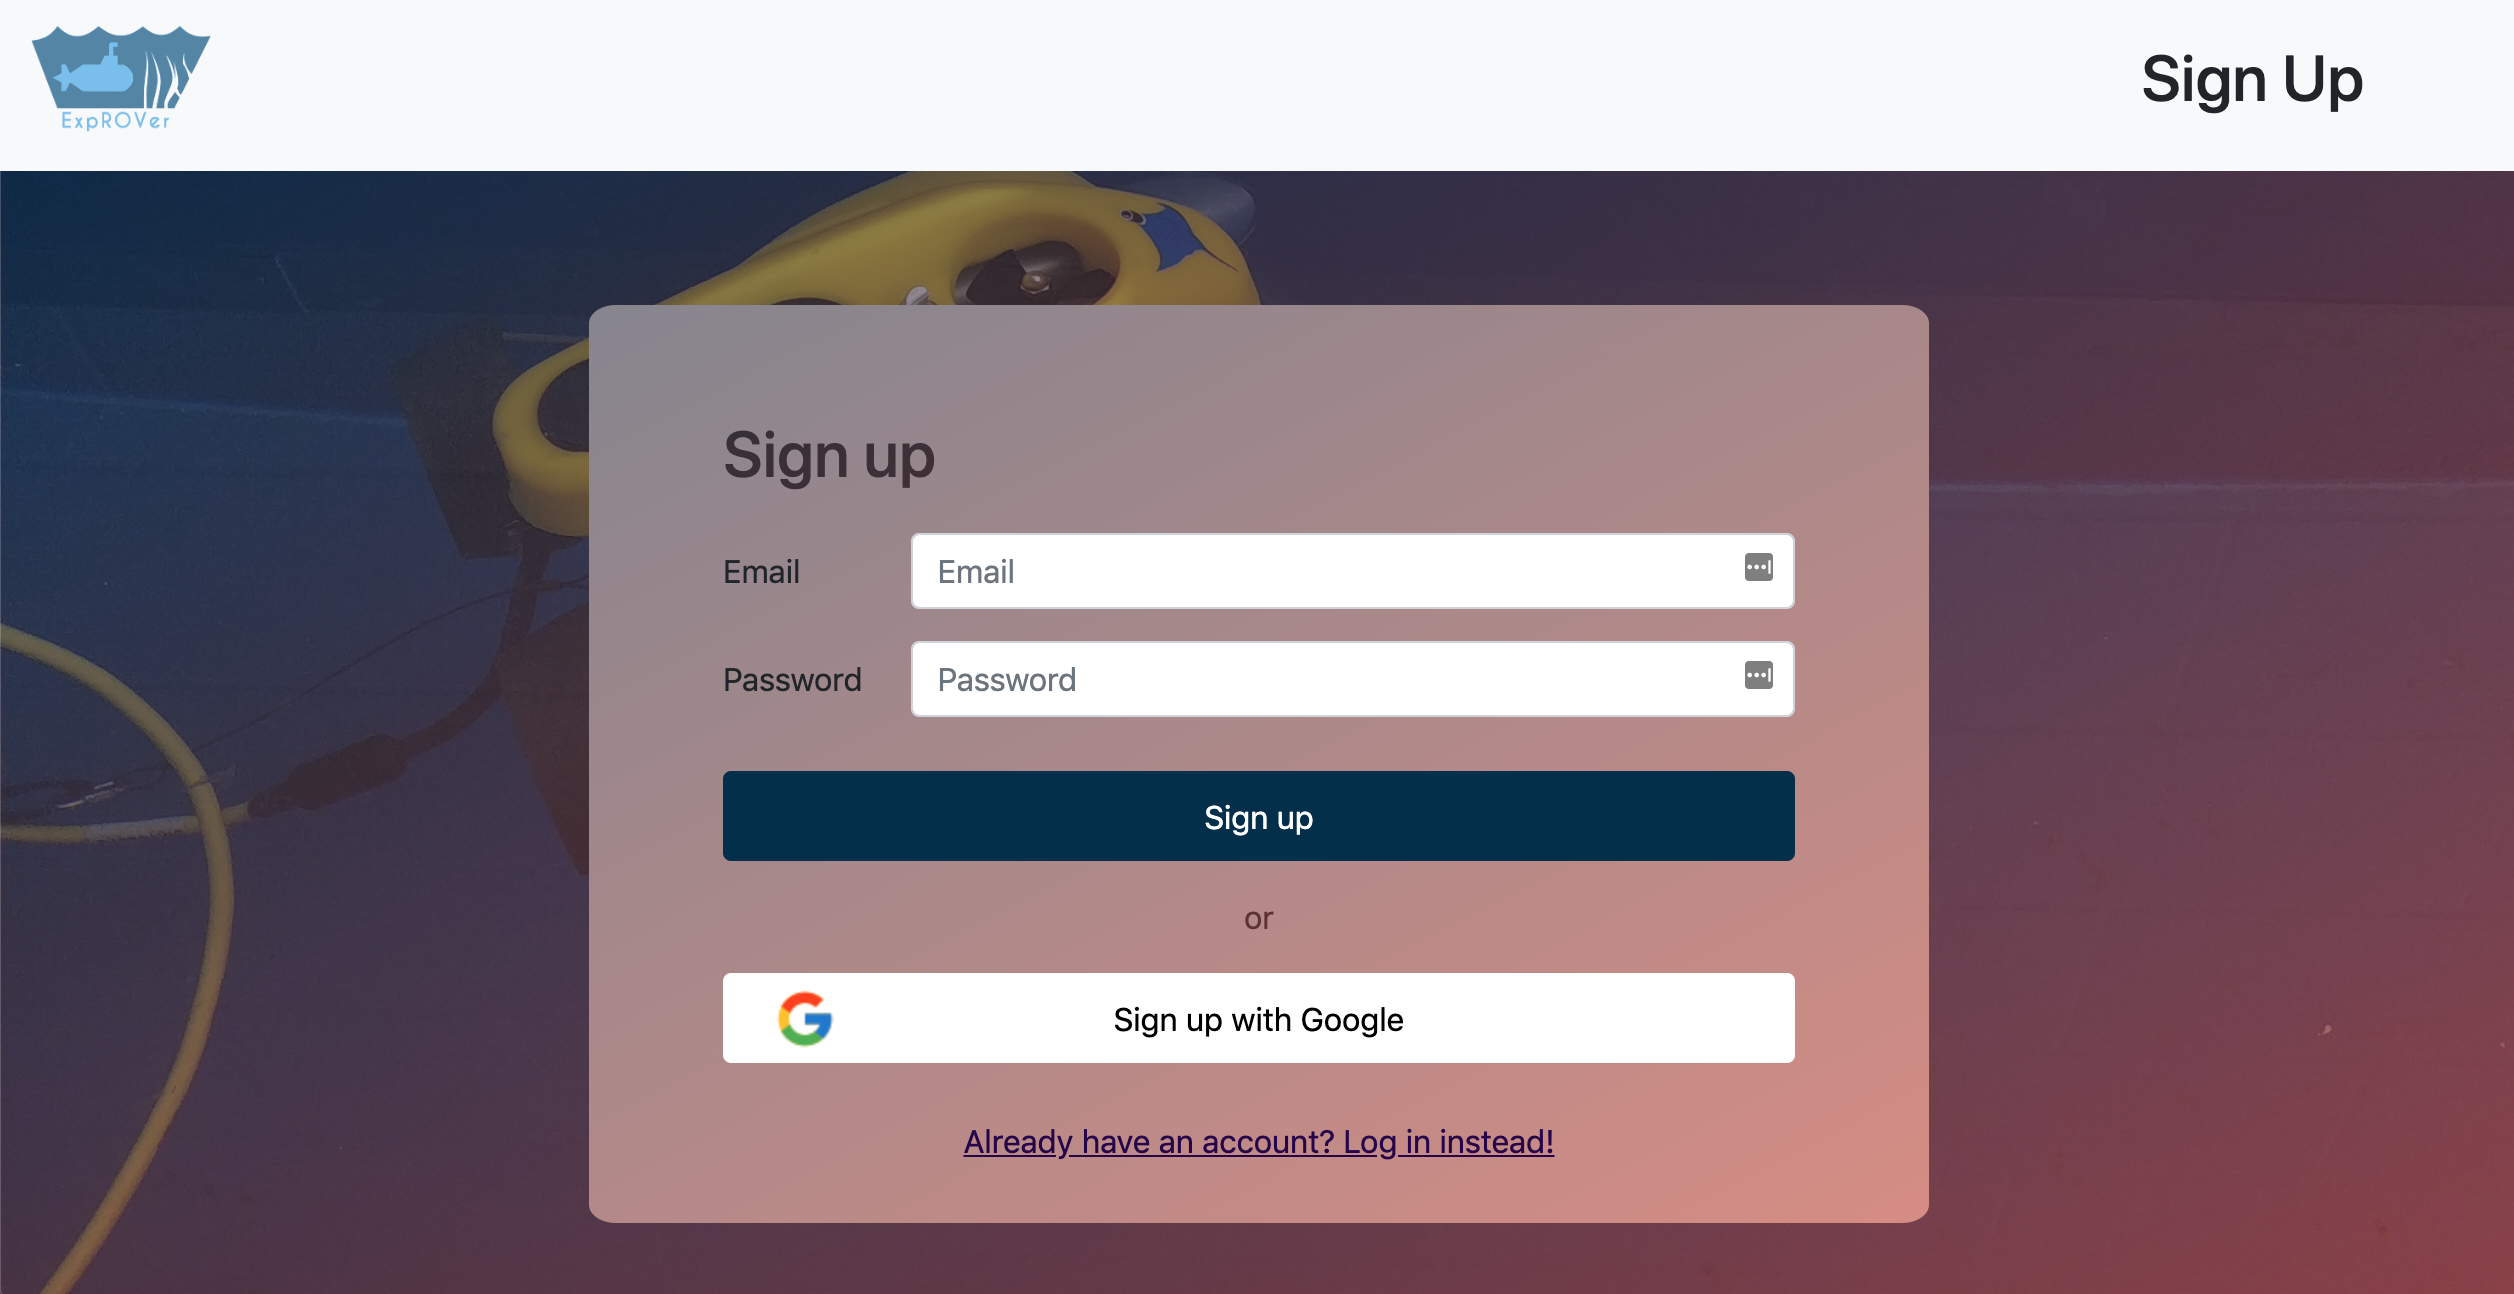
A page is displayed in order to proceed with registration (see Figure 2),
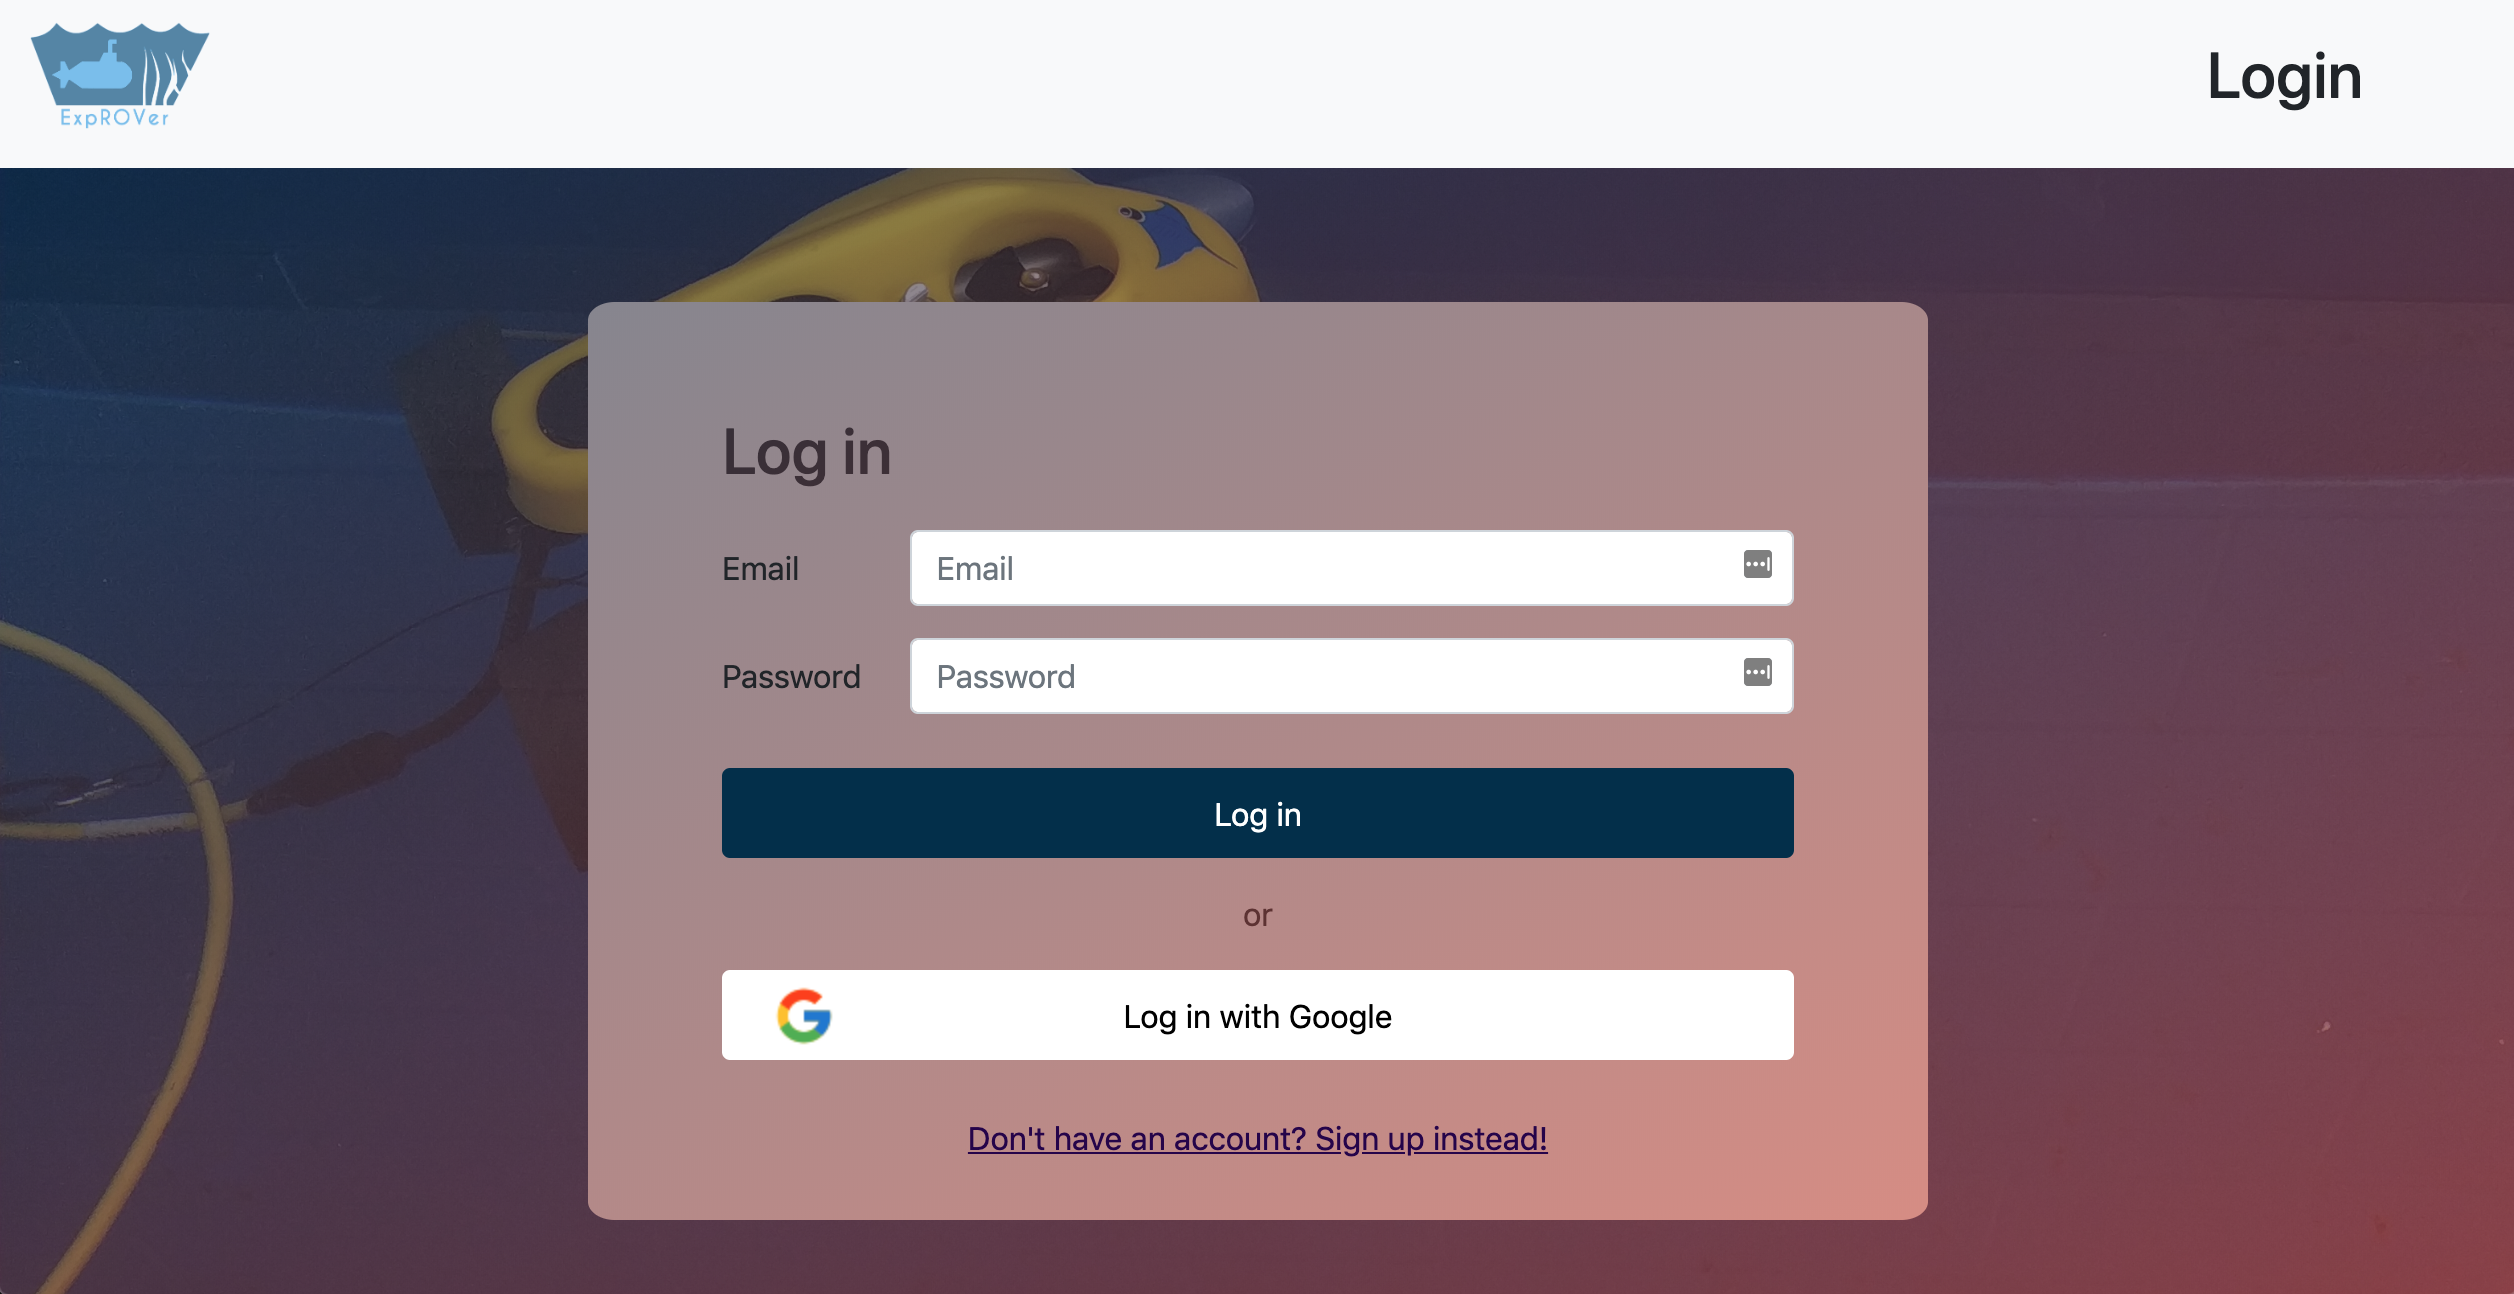
If you already have an account, you can instead log into the system (as depicted in Figure 3),
Main Screen
After a successful authentication, the system is ready to operate the ROV. If you have no ROVs, you must first add your ROV. After that you can list all your ROVs (see Figure 4),

Operation
Once you add the ROV you can now establish a connection to the VRP4. By using the keyboard you can now remotely control your ROV.
Shutdown
To shutdown the system, you can simply close the browser window.
ExpROVer Android Application
Start
After the successful installation of the ExpROVer mobile App, double click on the ExpROVer icon. A sign-in screen will appear. Insert your credentials to access your ROV. In case you do not have yet an account, you should sign-up to obtain your credentials. (See Figure 6)
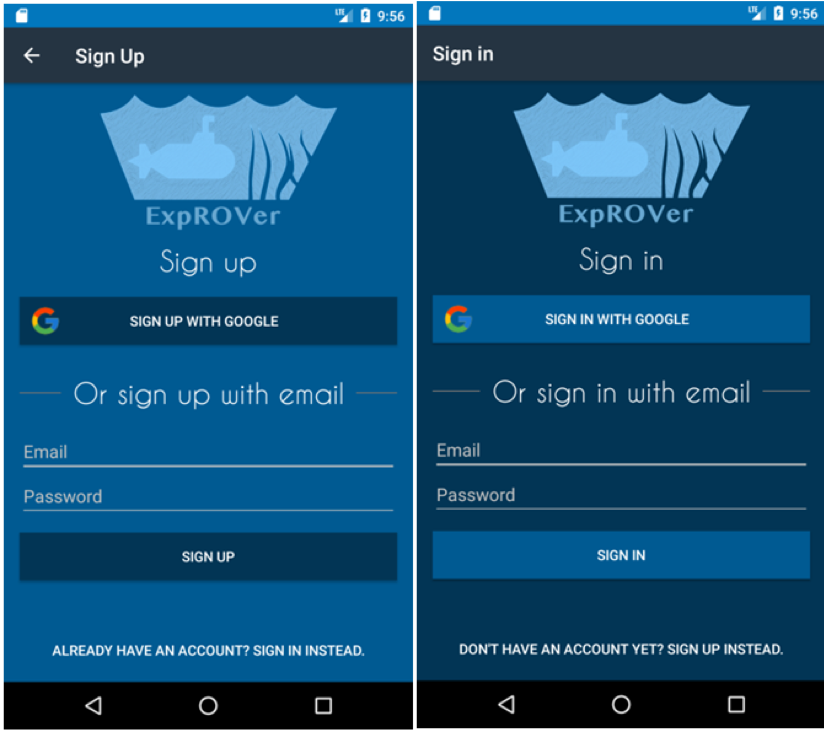
Note that, like in the web platform, you can also use your google account to sign up and to log into the system.
Main Screen
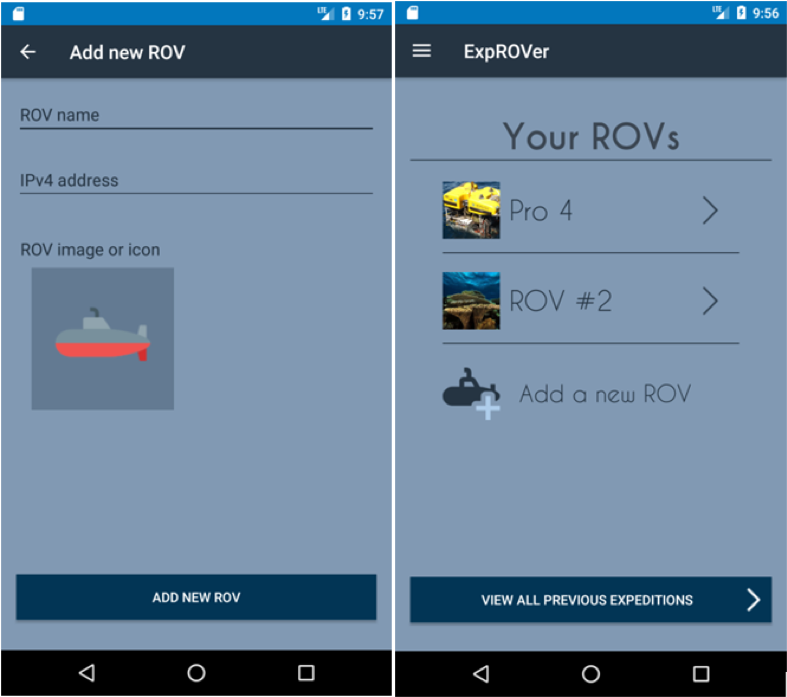
Once in the ExpROVer App the main screen to will appear as shown on the right in Figure 7. This screen presents all your ROVs, If you don’t have any ROV in the list you should click on the button “Add a new ROV”. By doing that a new screen will appear and you must insert the name and the respective IPv4 address of your ROV. You can also personalize it by uploading a photo of your ROV. After doing that and returning to main screen you should now be able to see your newly-added ROV in the list.
Operation
Configuration
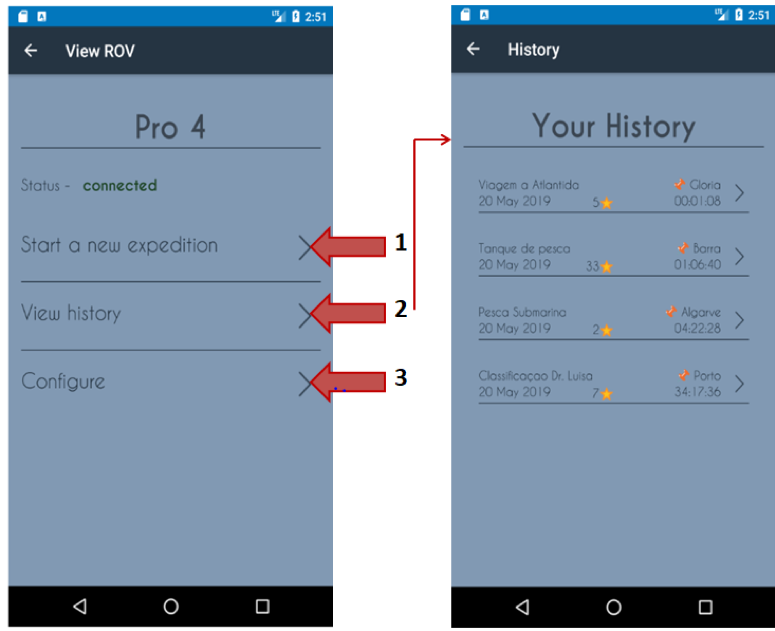
After choosing your ROV and turning it on you can star an expedition. To start an expedition click in the button “start an expedition (1). See Figure 8.
By clicking in 2 a new screen will be displayed with the history associated to that ROV, where you can see the video expeditions already performed (see the right side of Figure 8).
The configure button (3), allows you to reconfigure your ROV, changing its name, the IP address as well as its associated the photo.
Expedition
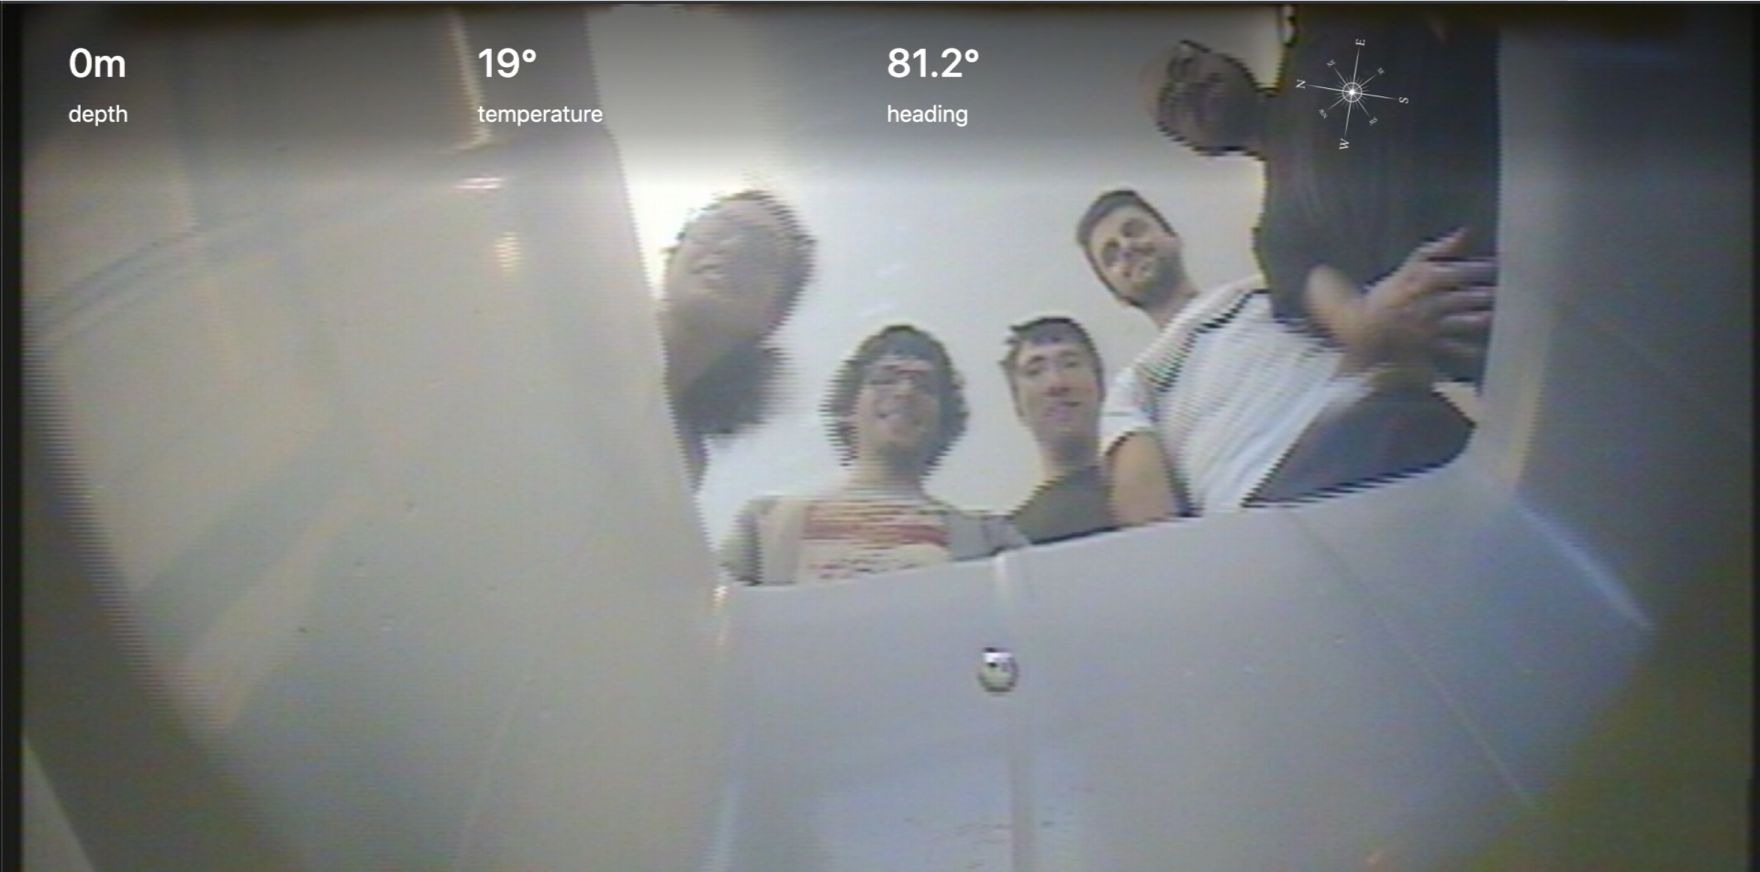
Once you start an expedition you will be able to see what the ROV “is seeing” (see Figure 9). In the top you should see the ROVs’ depth and the water temperature at ROVs’ depth. You can also see it’s heading, if activated in the settings (5).
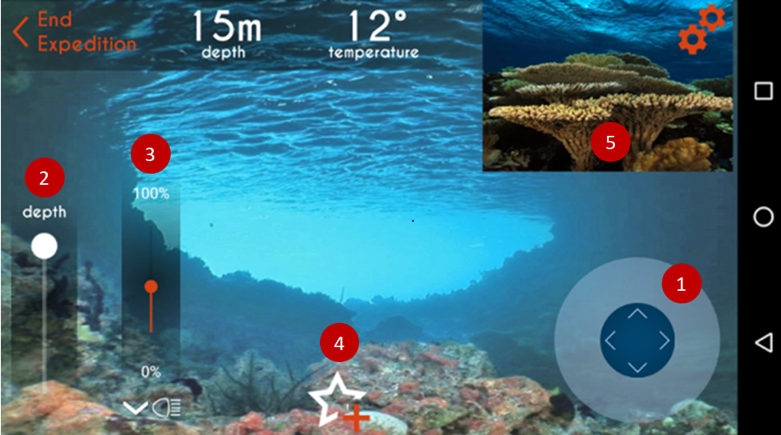
To maneuver the ROV you should use the joystick button (1) and to control your ROVs’ depth use the vertical joystick (2).
You can also easily control the intensity of ROVs’ lights by scrolling the lights button (3).
When you detect something that you consider important you can bookmark it, The system will store the exact time of occurrence and you can see it later. (4)
In (5) you can enable the heading sensor visualization, and activate or deactivate the presence of a reference picture.
Shutdown
Simply close the application.
Intelligent functionalities
The intelligent functinalities are available as separate scripts.
Computer Vision
Computer Vision isn’t run in real time due to the latency it would cause. It can be run on the video captured from the ROV (during operation, the video feed from the ROV is both streamed and saved to a hard drive, making this possible).
You can fint the computer vision software in the project’s repository, integrated in the backend folder (more particuarly, in the subfolder /backend/YOLOv3/).
To execute fish detection in a video, run the following command:
python yolo_video.py --input <input_video_path> --output <output_path>
# OR
python yolo_video.py [OPTIONS...] --image, for image detection mode
Semi-autonomous maneuvers
You can fint the semi-autonomous maneuvers in the project’s repository, integrated in the ROV folder (more particuarly, in the subfolder /backend/ROS/scripts/).
To run any maneuver, with wither the base or complete system currently actively, simply execute the desired maneuver, using a terminal and the command: $ rosrun videoray <script name>
Troubleshooting
1. I am using the complete system but I cannot establish the connection with the ROV
Check if all the cables are correctly plugged in. If yes, then check if you are using the correct IP address for your ROV.
2. I am using the complete system with the web app but I cannot control my ROV or the video feed from it has frozen
Check if you have Internet access.
3. I have an iPhone and I cannot find the ExpROVer app
ExpROVer mobile app is available only for Android smartphones. However you can use the ExpROVer web app to control your ROV.
4. I am using the complete system and I have no video, despite being able to send commands
The problem is probably your ROV’s camera. See the ROV’s user manual for more detailed information.
5. The temperature displayed has a strange value
The problem is probably your ROV temperature sensor. Please check the ROV’s user manual for more detailed information.
6. The depth is marking more than 300m
The problem is probably with the ROV’s depth/pressure sensor. Consult the ROV’s user manual for more detailed information.